Boudoir Redefined

kelsey2.jpg

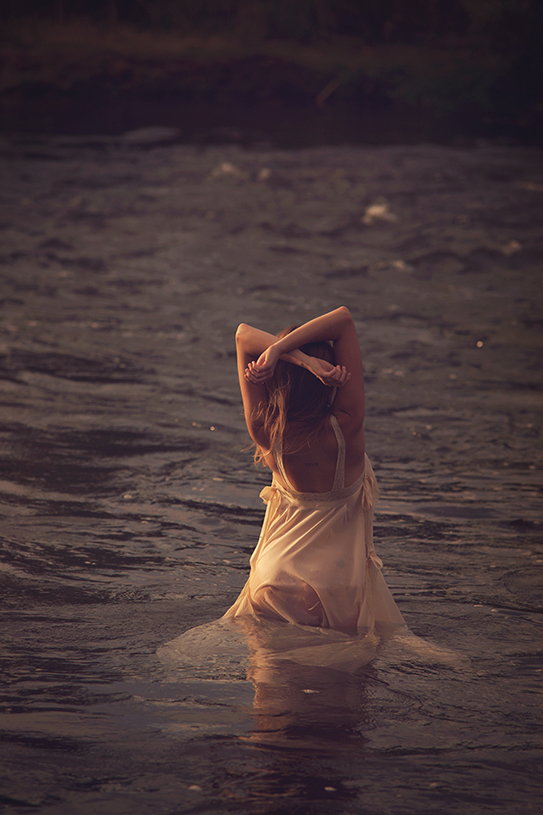
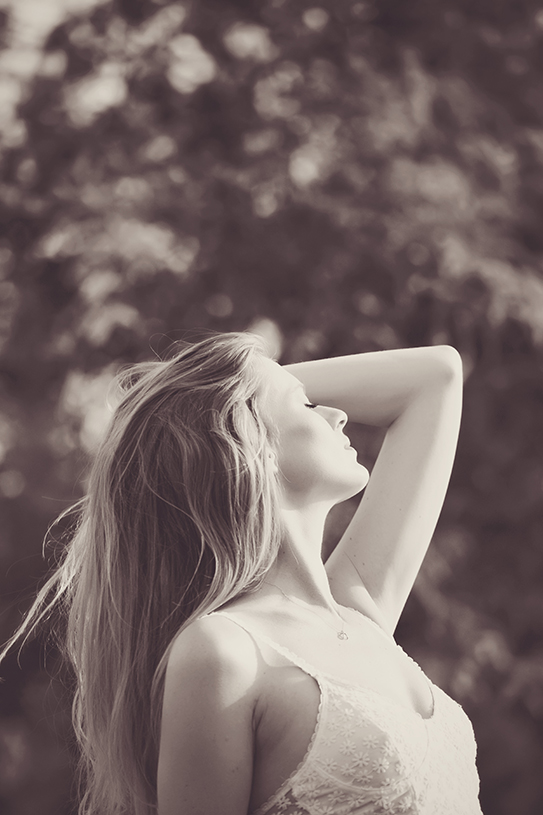
Sometimes you are just struck by an image and inspired immediately. I saw an image on Pinterest (click here), and right away I knew I wanted to do a photo shoot that celebrated the natural beauty of the female body. I loved the idea of seeing water droplets on the skin, golden sun rays illuminating the body and hair blowing in the breeze. Liz Evans was the perfect photographer for this project because she has a whole company called Boudoir Redefined seeking to redefine the celebration of the female form. Boudoir doesn't always need to be smokey eyes and bed sheets. Boudoir doesn't even mean a woman isn't wearing clothes...Boudoir is purely celebrating the female body. SONY DSC

I thought Kelsey would be the perfect model for this project. I had the chance to work with her during a bridal shoot, and I was just entranced by her beautiful skin. She was really excited about the project too! Azure Shaffer did her makeup on the bridal shoot and did an AMAZING job. I knew I wanted her back for this, especially since she knew her skin already.

SONY DSC

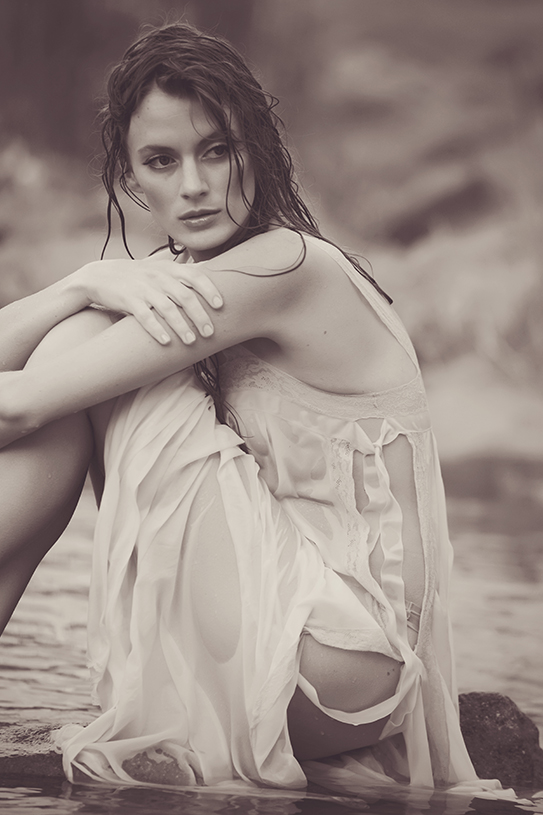
After three months of planning we headed out to the Salt River. It was a scorcher of a day. We all ended up in the water which was perfect to keep us cool. There were a couple of Tim Gunn make it work moments like sewing her into her bralette. It all worked out in the end.

SONY DSC

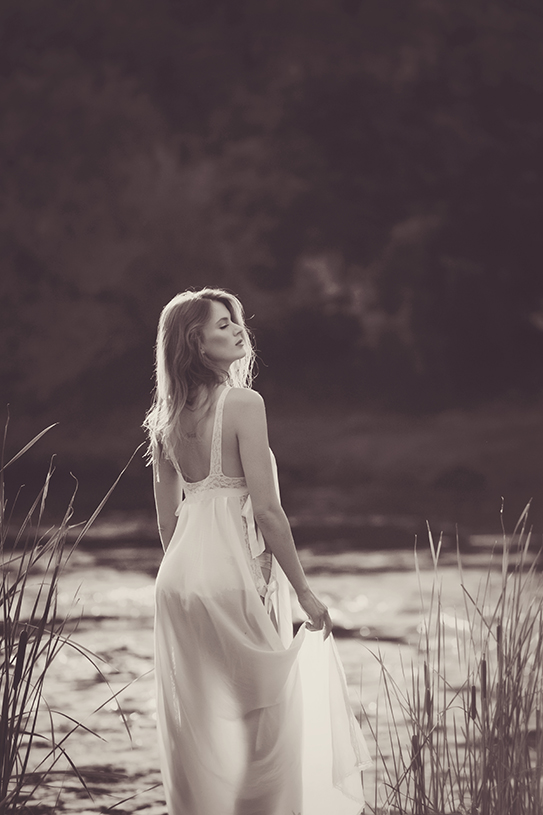
I loved this shoot because it was so simple. It wasn't about the clothes at all. It was just about the feeling, the light and the confidence of being a women. I did, however, get to use an amazing French vintage nighgown my mom's friend gave me. It was the PERFECT slip for this project. It had lace ties all down the side. A simple bralette and high-waisted swim bottoms from Urban Outfitters was the perfect second look.

SONY DSCSONY DSCSONY DSCSONY DSC

Photography by Liz Evans, Boudoir Redefined Art Direction and Styling by Alex Evjen, AVE Styles Modeling by Kelsey Groetken, Agency AZ Makeup by Azure Schaffer, Artistry by Azure Assistant Styling by Alyssa Hodson

Progress - 30 Thriving Challenge

photo-12.jpg

I have less than 30 days until I turn 30, and I am happy to report I have already met one of my goals!!! In the past six weeks with the BIG help of Mountainside Fitness I have gone from a Body Mass Index (BMI) of 22 to a BMI of 20. I have stayed the same weight of 124 pounds all while burning fat and gaining muscle. I have never felt more healthy in my life. I no longer feel weak, and I feel more confident in a bathing suit. I always thought the loose skin around my tummy was permanent due to pregnancy. I was really surprised to see my stomach tighten up more than ever before. I have room improvement in that area, but my arms and legs are finally showing some muscle definition.

I am so excited to turn 30, and to finally have a healthy lifestyle. #30ThrivingChallenge

Sea Salt & Coconut Popcorn

pop1.jpg

"Pop! Pop! POP!!!" That's what Elle says whenever I make popcorn. She can't eat it fast enough. It's definitely her favorite snack and my go-to healthy snack when I'm craving something salty. I usually make popcorn with olive oil and sea salt, but AVE Styles Intern, Alyssa Hodson, gave me the great idea to try it with coconut oil. Oh. My. Gosh! Game changer! This sea salt and coconut popcorn is the perfect salty, sweet snack for movie nights and road trips this summer. Add some coconut flakes and chocolate chips, and you have one decadent treat.

pop2

SEA SALT & COCONUT POPCORN

Yields  16 cups of popcorn

1/2 c Popcorn Kernels

3 Tablespoons of coconut oil
1 Teaspoon of sea salt
1)  Heat the stove to medium and throw in the coconut oil and sea salt. Toss in at least two kernels into the pan with the oil and when they pop, then the heat is right.  Take out those two kernels.
2) Add in the rest of the popcorn kernels until they are all popped. Remove from stove. Sprinkle more salt to taste.
If you have a sweet tooth, add 1/4 cup of chocolate chips and a 1/4 cup of coconut flakes to the popcorn after it is cool. Toss and serve!
pop3

Grilled Balsamic Nectarine Salad

necatrine2.jpg

I love nectarines! For the longest time I had no idea that they were actually peaches who have a recessive gene that eliminates the peach fuzz. Who knew!?! Well, Elle loves them as much as I do. During peach/nectarine season she eats almost one a day. So, the other day I decided to add them to a mixed green salad so that we could eat them together. Inspired by some recipes on Pinterest, I decided to concoct my own grilled nectarine salad. nectraine3


GRILLED BALSAMIC NECTARINE SALAD

Serves 4:

2 Tbsp. of balsamic vinegar

1/2 Cup of crumbled gorgonzola cheese

1/4 Cup of sunflower seeds

3 Nectarines

1 Bag of mixed greens

Favorite vinaigrette to taste

STEP 1: Wash nectarines, slice them in half and remove the pit.

STEP 2: Brush all sides of your nectarine with balsamic vinegar and place on your grill or grill pan using a low heat. Leave on there for about 4-5 minutes rotating once for some nice grill marks.

STEP 3: Meanwhile, assemble your salad by placing your mixed greens in a bowl, adding your sunflower seeds and gorgonzola cheese.

STEP 4: Remove the nectarines from the grill. Brush them once again with the balsamic vinegar. Slices them into more pieces and add to salad. If you are using this recipe for a dinner party, it looks gorgeous to plate the salad and then add a half of a nectarine on top of the greens.

STEP 5: Drizzle your favorite vinaigrette on top of the salad and toss. Add pepper or salt for flavor if you would like. I just added more balsamic and some olive oil to keep is simple.

I hope you enjoy this fresh and easy summer salad!

nectarine

Enjoying Life Sip by Sip - Cayenne & Cinnamon Honey Latte

afterlight.jpeg

I spend waaaay too much money at coffee shops and restaurants, especially during the summer. AVE Styles intern, Alyssa Hodson, is in the same boat. Together, we have decided to start a recipe series of our favorite foods and drinks that won't break the bank. Get to know Alyssa more and share in our yummy adventures! Waking up to the sweet aroma of coffee brewing in the morning is one of my fondest memories of when my grandparents came to visit.  My parents do not drink coffee, so it must have skipped a generation and hit me full force.  When I was young, one of my favorite parts of going to the store with my mom was getting to sample their coffee and cookies.  If you asked me how I took my coffee, I’d say there was little coffee compared to the creamer and sugar.  But now, if you asked me how I take my coffee, I take it seriously, very seriously J and on a budget.  Coffee can definitely take quite the bite out of a budget!  I was lucky enough to have Starbucks as a part of my meal plan as a college student (thanks GCU), but I am now graduated and I still need my coffee.  I may emphasize that I need coffee that tastes good and doesn’t break the bank.

So I have been experimenting at home and attempting to make coffee as good as my local coffee shop, which I do understand is quite the feat to overcome.  I used to have a cheap coffee pot that in turn gave me cheap tasting coffee.  I’ve learned so far that something as simple as trying a different brewing method or grinding the beans right before you brew may seem little, but they can definitely affect the taste of your coffee.  I decided to go shopping and was able to find a coffee press for $5 (Most of them run around $20, but I found this gem at Ross).  I would suggest buying the coffee beans whole and buying a grinder separate.  Heads up though, don’t grind your beans too small or you’ll find a lot of pieces of coffee beans in your coffee cup and not at the bottom of your coffee press.  Not very pleasant when you have to chew your coffee.  If you want to use your coffee press right away and don’t have a grinder, no worries! Just find a coarser ground coffee that you like.

coffee

Check out this link on how to use a coffee press:  http://stumptowncoffee.com/brew-guides/press-pot/. And this link for more information on the actual brewing method for fellow coffee snobs: http://www.sweetmarias.com/brewinstr/brewinginstr.frenchpress.php

To spice up your coffee life, here’s one simple recipe that we've tried and liked.  It's sassy and sweet with hint of cayenne pepper (the sass) and with honey (the sweet) and cinnamon to balance. You can even pour this over iced coffee if you prefer cold drinks in the summertime.

cinnamonlatte

Cayenne & Cinnamon Honey Latte

For 2 cups of coffee:

1/8 Teaspoon of Cinnamon

2 Dashes of Cayenne Pepper

1 Tablespoon of Sweetened condensed milk

1 Teaspoon of Honey

2 Cups of Hot Coffee

Helpful Hints:

1)  When mixing the ingredients, try throwing the Cinnamon and Cayenne Pepper along with the coffee grounds when brewing the coffee. For example, if you used a coffee press I throw the cinnamon and cayenne pepper along with the coffee grounds in the beginning, so that they leave the taste and not the clumps of powder.

2)  Then pour the mixture over the sweetened condensed milk and honey.

3)  If you use a different type of milk, you could even try steaming it beforehand and then pouring it into the coffee.

4)  Also, these measurements are according to taste, so if you like your coffee with more of a kick, throw some more cayenne in there! If you would like it less sweet, hold the honey. The coffee cup is your canvas.